Geotagging photographs is the process of adding a latitude and longitude to the photograph. All photo files come with an associated metadata file; the most common is the EXIF format, although there are others. If you look at the properties of one of your photographs, under the "details" tab, you will see a range of information about the photograph, right down to the focal length, f-stop and shutter speed, make and model of the camera, and of course the time the photo was taken (for some reason, in Windows, the time the photo was taken is labelled under "Date modified" not "Date created").
If your camera has a built-in GPS or you have a GPS accessory for your camera, you can automatically geotag your photos. Modern cellphones come with a geotagging option (you need to turn on the Geotagging in the camera settings). But what if you don't have that tool, and you have a batch of several hundred photos that need geotagging? You can't manually geotag them all in Picassa or Google Earth.
There are several software tools available online that can make the process a lot easier. The one that I've been using is a free tool called ExifTool. I'm going to explain how I use Exiftool to geotag several hundred photographs at a time, using separate GPS trackfiles.
The ExifTool website describes exactly how to use the tool, but you might need a bit of a primer before you can get started. I'm going to do my best to put together that primer.
Note: the advice below only applies to Windows.
1) Download the ExifTool.exe file and place it in your C:\windows directory
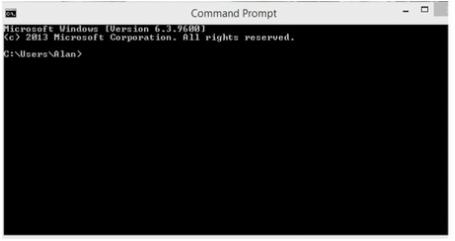
2) Open the Command line (go to windows search, type "CMD" and the window will open)
3) In the command line, change directory to your path. That should be something like C:\users\alan (to change directory, type cd "C:\users\name". In my case, it's cd c:\users\alan)
4) Now you're ready to use the ExifTool in the command line.
Geotagging your photos
To geotag your photos, you need a GPX track file from your GPS. If you've been working in the field with a GPS, and the track log is running, you can download the GPX file. Depending on the date that you saved the file, it should have a filename like TRACK_2015_11_07 123423.gpx (the date and time it was saved). You also need at least one or two reference photographs - photos where you know the precise location of the image. You need to apply a GPS time stamp to the photo (which is separate from the camera's time stamp), which I'll explain below. Remember the filename of the reference photo (e.g SAM_1603.jpg). In my case, I renamed the reference photo to GPS_234.jpg for simplicity.
Your GPS time stamp records the time in UTC (formerly Greenwich mean time). In South Africa, that means that your GPS time will be two hours ahead of the local time. Don't worry too much about that.
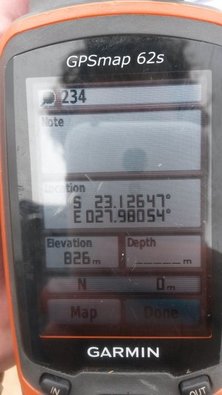
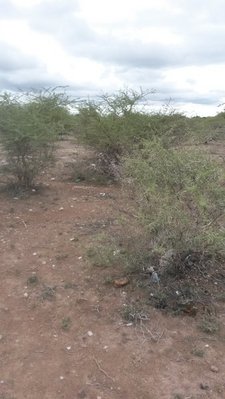
For some time now, I've been taking the occasional picture of my GPS itself, with a waypoint marked. I usually do this to quickly provide a reference for a photograph of a key location or object. So if I see a rare plant, I'll photograph the plant and then mark the location of my GPS and photograph the face of the GPS immediately. This, completely by accident, provided a handy tool for synchronising my GPS points with my photographs using ExifTool, which I'll come to in a moment.
The other way you can synchronise your photos is by picking one image where you know the location, and then finding that location on your GPX tracks or waypoints (just upload the GPX file to Google Earth, pick the spot where the photo was taken, and pick the nearest trackpoint or waypoint. By nearest, I mean "on the spot where the photo was taken"). Record the waypoint name or trackpoint number.
1) Move your GPX file to the same directory where you are working in the command line (in my case, c:\users\alan). Change the name of the file to something simple like "track_log.gpx"
2) Move your folder with the images to the same directory. We'll call the folder "project_photos" (the underscore keeps things simple in the command line)
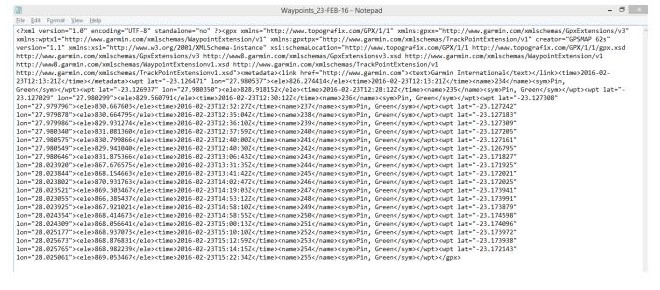
3) Open your GPX file in a text editor, like Notepad. You will see a wall of text describing all the points.
Handy tip: if your GPS data is stored in more than one file (e.g. if you worked over more than one day and saved your waypoints and trackpoints as separate GPX files) you can open all the files in a text editor, then copy and paste all the trackpoints or waypoints from the second and subsequent files to the first file, after the last </wpt> or </trkpt> tag and before the final </gpx> tag.
4) So find the name of your reference point. It will be between the "name" tags, like this: <name>234</name>.
To avoid confusion, you might want to copy and paste the entire waypoint into a blank text editor:
<wpt lat="-23.126471" lon="27.980537"><ele>826.274414</ele><time>2016-02-23T12:13:21Z</time><name>234</name><sym>Pin, Green</sym></wpt>
If you look at the line, you will see that there is a wealth of data. The latitude and longitude, the elevation, the date and time, the name of the waypoint, and what symbol is used to represent the waypoint on your GPS (in this case, a green flag). The one piece of information that is relevant to the next step is the time; this waypoint was recorded on 23 February 2016 at 12:13:21 UTC.
5) In the command line, type exiftool -gpstimestamp="12:13:21" c:\users\alan\project_photos\GPS_234.jpg
The Exiftool has applied the GPS timestamp to the image. Now your image has two important data: the time recorded by the camera, and the time recorded by the GPS at the same location and time. Apart from the time zone difference, there will be a difference between the accuracy of the camera and gps times. This time difference is used to apply the correct GPS time stamp to every image in your folder, and interpolate the location of the photograph from the times in the GPS track log.
6) In the command line, write
exiftool -geosync="c:\users\alan\project_photos\GPS_234.jpg" -geotag track_log.gpx "c:\users\alan\project_photos"
This tells the tool to use your reference image to synchronise the camera and GPS times (-geosync) and then interpolate locations from the track log to all the images in the folder (-geotag)
Now Exiftool will apply the Geotag to every image in the folder.
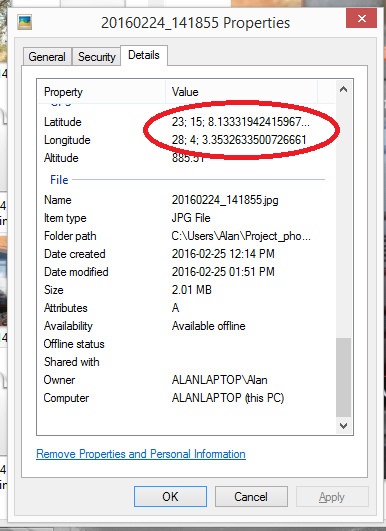
7) Check the accuracy of one or two reference photos, where you know the exact GPS coordinates. Right-click on the relevant image, click "properties" and click the "Details" tab. Scroll down until you see the GPS coordinates. They will be presented in Deg min sec format. Refer to the locations of those images (on Google Earth, in your notes or on your GPS waypoints) and check whether they are accurate.
If they are accurate, then you are done. You can move all your project files and folders back to your project folder. However, there is one more step that you may find useful - providing a map of all of your images.
Mapping your images in Google Earth
2) Place the new folder in the c:\users\name directory
3) Copy and paste the following text into a text editor (from the ExifTools geotag page):
#------------------------------------------------------------------------------
# File: kml.fmt
#
# Description: Example ExifTool print format file for generating a
# Google Earth KML file from a collection of geotagged images
#
# Usage: exiftool -p kml.fmt FILE [...] > out.kml
#
# Requires: ExifTool version 8.10 or later
#
# Revisions: 2010/02/05 - P. Harvey created
# 2013/02/05 - PH Fixed camera icon to work with new Google Earth
#
# Notes: 1) All input files must contain GPSLatitude and GPSLongitude.
# 2) For Google Earth to be able to find the images, the input
# images must be specified using relative paths, and "out.kml"
# must stay in the same directory as where the command was run.
# 3) Google Earth is picky about the case of the image file extension,
# and may not be able to display the image if an upper-case
# extension is used.
# 4) The -fileOrder option may be used to control the order of the
# generated placemarks.
#------------------------------------------------------------------------------
#[HEAD]<?xml version="1.0" encoding="UTF-8"?>
#[HEAD]<kml xmlns="http://earth.google.com/kml/2.0">
#[HEAD] <Document>
#[HEAD] <name>My Photos</name>
#[HEAD] <open>1</open>
#[HEAD] <Style id="Photo">
#[HEAD] <IconStyle>
#[HEAD] <Icon>
#[HEAD] <href>http://maps.google.com/mapfiles/kml/shapes/placemark_circle.png</href>
#[HEAD] <scale>1.0</scale>
#[HEAD] </Icon>
#[HEAD] </IconStyle>
#[HEAD] </Style>
#[HEAD] <Folder>
#[HEAD] <name>Waypoints</name>
#[HEAD] <open>0</open>
#[BODY] <Placemark>
#[BODY] <description><![CDATA[<br/><table><tr><td>
#[BODY] <img src='$directory/$filename'
#[BODY] width='$imagewidth' height='$imageheight'>
#[BODY] </td></tr></table>]]></description>
#[BODY] <Snippet/>
#[BODY] <name>$filename</name>
#[BODY] <styleUrl>#Photo</styleUrl>
#[BODY] <Point>
#[BODY] <altitudeMode>clampedToGround</altitudeMode>
#[BODY] <coordinates>$gpslongitude#,$gpslatitude#,0</coordinates>
#[BODY] </Point>
#[BODY] </Placemark>
#[TAIL] </Folder>
#[TAIL] </Document>
#[TAIL]</kml>
Save the file in the same directory as your photos, as kml.fmt (you need to change the .txt extension to .fmt)
Personally, I don't like the big clunky Google Earth flag marker (in the original code), so in the code above I replaced it with a circle icon.
4) Type
exiftool -p kml.fmt "c:\users\alan\image_folder" > out.kml
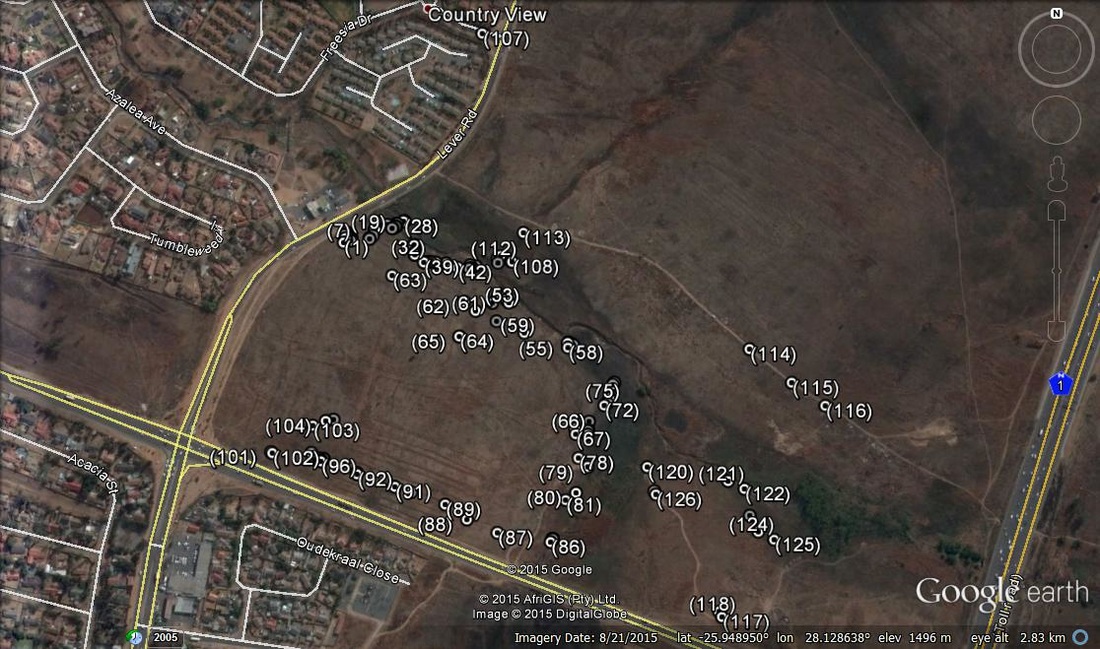
The tool will generate a kml file in the same directory that you can show in google earth with the filenames of each image as labels.
Firstly, your filenames all have the .jpg extension, which makes them unnecessarily messy.
1) Go to the kml file, right click, click open with... and choose a text editor (e.g. Notepad).
2) Do a find and replace. Find ".jpg</name>" and replace with "</name>". Save
Now all the .jpg extensions have been removed from the labels. Remove your kml from Google earth and then replace it.
But what if your filenames are clunky and inefficient, with lots of "SAM_1702 Themeda triandra possibly with some hyparhennia in the background.jpg"?
There's a simple way to rename all your photos simultaneously. This is where I will usually work with a copy of the photos for the report, rather than the original files, because I use my clunky filenames for searching for images.
1) Open the folder with the photos
2) Order them by the "date taken" column (in the menu, click on the "view" tab, choose "Details" then click "add columns" then check the "Date taken" column. NOT the "Date Created" column)
3) Sort in ascending order by Date taken.
4) Select all (Ctrl+A)
5) Right-click the first image, click "Rename" and rename them all (I just use a space). All the photos will be renamed with the same filename followed by a number in brackets. With a space as the name, the photos become (1).jpg, (2).jpg, and so on.
Now run the KML format tool as described above, and remove the .jpg tags from the labels, as described above. You will now be able to produce a google earth image with all your photos labelled as points (1)-(n).
Your photos can then be archived, included in the report with tag numbers, or sent to the client along with the kml file so that each photo has a reference point. In addition, the photos themselves are geotagged, and you can use Picassa or any number of other tools to view and locate your photographs.
The ExifTool website provides detailed instructions for a range of functions that can be performed with the tool - the methods I've outlined were the ones that, by trial and error, worked best for me. But there are many other ways of achieving the same goals described on the website, and my methods may not even be the most efficient. Read through the site and the instructions, and see what else is possible.
 RSS Feed